A laser engraver is a precise and efficient tool for creating detailed designs on various materials. But like any machine, it needs proper care to keep performing at its best. Regular maintenance ensures your laser engraver stays accurate, reliable, and ready for use, whether you’re working on delicate designs or large-scale projects. Different types of laser engravers have specific maintenance needs. Neglecting these can lead to expensive repairs, decreased output quality, or even a shorter machine lifespan. In this article, we’ll guide you through practical maintenance steps to keep your laser engraver running like new.
Maintaining a Laser Engraving Machine
Proper maintenance of a laser engraving machine is key to keeping it in top condition and extending its life. With routine care, your machine will stay accurate, efficient, and ready to tackle any project.
Here are the main areas to focus on:
Regular Cleaning
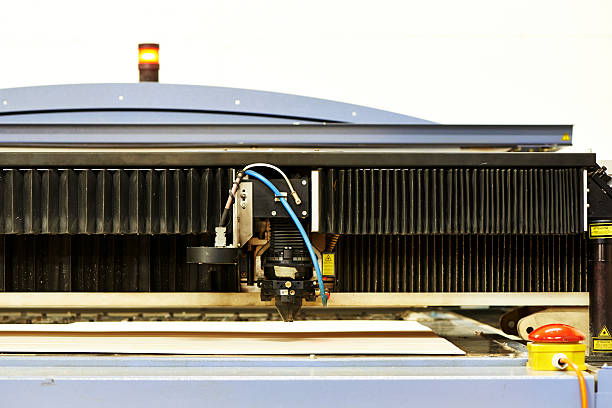
Dust, debris, and residue from engraving can build up on the machine’s lens, mirrors, and working area. This reduces the quality of engravings and can strain the machine’s laser beam. To maintain precision and avoid unnecessary wear, clean these parts frequently with the right tools, like lens wipes and non-abrasive cleaners.
Cooling System Maintenance
Most laser engravers have a cooling system to prevent overheating during use. Regularly check the water chiller or cooling fans to ensure they are functioning properly. Replace the coolant if necessary and clean the system to avoid blockages or contamination.
Lubricating Moving Parts
The rails, bearings, and other moving parts of the machine need lubrication to function smoothly. Over time, these parts can develop friction, leading to reduced accuracy. Use the recommended lubricant and apply it as specified by the manufacturer to keep movements smooth.
Firmware Updates
Many CNC engraving lasers rely on software for precise operation. Check for firmware updates provided by the manufacturer and install them promptly. Updated software often includes bug fixes and performance enhancements that improve machine efficiency.
Proper Storage
If the laser engraver won’t be used for an extended period, store it in a clean, dry, and dust-free environment. Cover it to prevent exposure to moisture or contaminants, which can damage sensitive components.
Regular Cleaning of Lens and Mirrors for Optimal Output
Keeping the lens and mirrors of your laser engraver clean is crucial for maintaining optimal performance. These components play a direct role in directing the laser beam with precision, so any dust, dirt, or residue can weaken the beam and reduce engraving quality.
Dirty lenses or mirrors scatter the laser beam, leading to uneven cuts or engravings. Over time, residue buildup can also cause overheating, potentially damaging these critical parts. The frequency of cleaning depends on how often you use the machine and the type of material engraved. For high-use machines or engraving materials like wood or acrylic that produce more residue, clean the lens and mirrors daily or after each session.
Check how to clean lenses and mirrors below:
Gather the Right Tools
Use soft, lint-free cloths, lens wipes, and non-abrasive cleaning solutions specifically designed for optics. Avoid harsh chemicals that could damage coatings on the lens or mirror surfaces.
Turn Off the Machine
Always power off the machine before cleaning. This ensures safety and prevents accidental misalignment of components during the process.
Remove the Lens and Mirrors Carefully
To remove these parts properly, refer to the manufacturer’s manual. Handle them with clean, dry hands or use gloves to prevent smudges or fingerprints.
Clean Gently
Apply the cleaning solution to the cloth, not directly to the lens or mirrors. Wipe gently in a circular motion to remove smudges and dust. For stubborn debris, use compressed air or an appropriate tool to dislodge particles.
Reinstall with Precision
Once cleaned, carefully reinstall the lens and mirrors. Then, double-check their alignment to ensure the laser beam travels correctly through the system.
Checking and Replacing Worn Components
Worn components can impact the performance of your laser engraver and even lead to costly downtime. Keeping an eye on parts that wear out over time helps keep your machine running smoothly and prevents unexpected breakdowns.
Here are some common components to inspect:
Belts and Gears
Belts and gears move the laser head during engraving. Over time, they can stretch, crack, or lose tension. If you notice uneven cuts or jerky movements, inspect these parts for damage. Replace belts that have lost elasticity and regularly lubricate gears to reduce friction.
Laser Tube
The laser tube is the heart of the machine. It loses power gradually with use, resulting in weaker cuts or engravings. Depending on the type of laser engraver, a CO₂ laser tube might need replacement every 1,000 to 2,000 hours of use. So, check the tube’s power output periodically to know when it’s time for a replacement.
Focus Lens and Mirrors
Besides cleaning, check for scratches, cracks, or discoloration on the focus lens and mirrors. Damaged optics reduce laser efficiency and can overheat. Replace them immediately if you notice wear.
Cooling System
The cooling system prevents the laser tube and other components from overheating. Inspect the water chiller or fans for proper operation. Replace worn-out fans or clean clogged cooling lines to maintain optimal performance.
Tips for Proper Machine Calibration and Testing
Proper calibration prevents errors that waste time and materials. Testing ensures your machine stays in peak condition, reducing the risk of costly rework. With the tips below, your laser engraver will deliver reliable and accurate results every time.
Align the Laser Beam
Misalignment can cause uneven cuts or engravings. You can use a piece of masking tape on the mirrors to check if the laser beam hits the center. Then, adjust the mirrors and laser head screws until the beam lines up perfectly.
Focus the Laser Properly
The focus point determines how sharp and deep your engravings will be. Use the machine’s focus tool or manually measure the correct distance between the laser head and the material. If your engravings look blurry or inconsistent, double-check the focus height.
Test Engraving Speed and Power Settings
Run a test grid on a scrap piece of material to determine the right speed and power combination. Too much power can burn the material, while too little leaves a faint mark. Adjust until you get clean, sharp engravings. Save the settings for different materials for future reference.
Calibrate the Bed Level
An uneven bed can throw off your results, especially for larger projects. Use a leveling tool or test cuts to ensure the material surface is flat and parallel to the laser head. Adjust the bed height if needed to maintain accuracy.
Perform Regular Test Runs
Before starting a major project, run a test pattern to ensure the machine is working correctly. Look for irregular lines, inconsistent depths, or missed spots. Address these issues before proceeding with the final job.
Preventive Maintenance for Avoiding Downtime
Preventive maintenance is key to keeping your laser engraver running smoothly. It saves you from unexpected breakdowns, expensive repairs, and production delays. A little effort now can prevent bigger problems later.
Inspect Moving Parts Regularly
Check belts, rails, and gears for wear and tear. Loose or damaged components can reduce accuracy and strain the motor. Tighten loose parts and replace worn ones as needed. Keep rails clean and lubricated to ensure smooth movement.
Clean the Exhaust System
The exhaust system removes fumes and debris during engraving. Over time, dust and residue can clog the vents, reducing efficiency. Clean the exhaust fan and filters regularly to maintain proper airflow and prevent overheating.
Monitor Cooling Systems
Laser engravers often use water or air cooling to prevent the laser tube from overheating. Check the coolant levels, clean water tanks, and replace the coolant periodically. If your machine uses an air compressor, clean the filters to avoid blockages.
Check Electrical Connections
Loose or corroded wires can cause power issues or sudden shutdowns. Inspect the connections, tighten any loose plugs, and clean off corrosion. Make sure the power supply is stable and suitable for the machine’s requirements.
Replace Consumable Parts Proactively
Components like laser tubes, lenses, and mirrors have limited lifespans. Hence, monitor their performance and replace them before they fail. Keeping spare parts handy can save time and reduce downtime when replacements are needed.
Conclusion
Maintaining your laser engraver is key to keeping it running smoothly for a long time. Clean the lens and mirrors regularly to ensure precise results. Replace worn parts, like belts and tubes, to avoid sudden breakdowns. Calibrate the machine and test it often to maintain accuracy. Preventive maintenance, like checking the cooling system and lubricating parts, helps avoid costly repairs and downtime. With regular maintenance, your laser engraver will stay reliable, efficient, and ready for every job.
At Zintilon, we’re here to help you get the most out of your engraving laser. From expert tips to reliable parts, we make it easy to get engraving laser solutions. Contact us today and take your engraving projects to the next level!